4 minutes
Nuclei: The Sniper of Vulnerability Scanners
What is Nuclei?
Nuclei is a fast, open-source vulnerability scanner built by the folks at ProjectDiscovery.
If you’ve used traditional scanners, you know they usually work like a “shotgun”—firing a massive, hard-coded database of checks at a target and hoping something hits. This often results in a lot of noise, slow scans, and false positives.
Nuclei is different. It acts more like a “sniper.” It is entirely template-based, meaning it uses simple YAML files to describe exactly how to detect a specific vulnerability. This allows you to send precise requests to detect specific bugs (like a brand-new CVE) across thousands of hosts in minutes, without the mess of a generic scan.
Why people love it:
- It’s fast: Built in Go, it handles parallel scanning effortlessly.
- Community Powered: The security community writes and updates templates constantly. Often, a template for a new CVE is available within hours of its disclosure.
How can I use Nuclei? (Basic Usage)
Once you have Nuclei installed (usually via Go or a binary), you run it directly from the command line. Here are the essentials:
1. Scan a Single Target
This scans example.com using the default list of community templates.
nuclei -u https://example.com
- Scan a List of Targets If you have a file urls.txt with many domains, Nuclei handles them in parallel.
nuclei -l urls.txt
- Use Specific Templates To avoid scanning for everything, you can specify a template or a folder of templates (e.g., only looking for CVEs or misconfigurations).
nuclei -u https://example.com -t cves/ -t misconfiguration/
Writing a Custom Template to Detect XSS
One of Nuclei’s coolest features is its extensibility. You aren’t limited to the default list of vulnerabilities provided by the community.
Nuclei allows you to write your own YAML templates, giving you the freedom to create custom test scenarios, reproduce specific bug bounty findings, or build regression tests for your own applications.
Let’s get our hands dirty and write a template that uses DAST capabilities to “fuzz” a URL and find Reflected XSS.
The Full Template
Here is the complete code for xss.yaml. Don’t worry, we’ll break it down below.
id: reflected-xss

info:
  name: Reflected XSS
  author: Enigma522
  severity: medium
  tags: xss,dast
  description: Find Ref XSS in query params
  reference: github


http:
  - payloads:
      xss:
        - "<img src=1 onerror=eval(atob('YWxlcnQoJ1hTUycp'))>"
        - "<script>alert(1)</script>"
        - "'\"><img src=x>"

    fuzzing:
      - part: query
        mode: single
        fuzz:
          - "{{xss}}"

    stop-at-first-match: true

    matchers-condition: and
    matchers:
      - type: word
        part: body
        words:
          - "{{xss}}"

      - type: word
        part: content_type
        words:
          - "text/html"
you can find the template here https://github.com/enigma522/nuclei-templates
Let’s Break It Down
- The Metadata First, we need to give our template an identity.
id: reflected-xss

info:
  name: Reflected XSS
  author: Enigma522
  severity: medium
  tags: xss,dast
  description: Find Ref XSS in query params
  reference: github
- The Protocol & Payloads Nuclei supports multiple protocols (DNS, FILE, TCP), but we are using http. Here, we define a list variable named xss that contains the malicious strings (payloads) we want to inject.
http:
  - payloads:
      xss:
        - "<img src=1 onerror=eval(atob('YWxlcnQoJ1hTUycp'))>"
        - "<script>alert(1)</script>"
        - "'\"><img src=x>"
- The Fuzzing Engine This is where the magic happens. We tell Nuclei to look at the query part of the URL (the stuff after ? like ?id=1).
- mode: single: Tells Nuclei to replace parameters one by one.
- fuzz: Tells it to replace the original value with our {{xss}} payloads defined above.
    fuzzing:
      - part: query
        mode: single
        fuzz:
          - "{{xss}}"
- The Matchers (Success Condition) Finally, how do we know if it worked? We use Matchers. To avoid false positives, we use matchers-condition: and. This means Nuclei will only report a vulnerability if BOTH of these things happen:
- The exact payload ({{xss}}) is reflected back in the response body.
- The response header content_type is text/html (because XSS won’t trigger in a JSON or Plain Text file).
We also added stop-at-first-match: true so the scan stops immediately after finding one vulnerability, saving time.
    stop-at-first-match: true

    matchers-condition: and
    matchers:
      - type: word
        part: body
        words:
          - "{{xss}}"

      - type: word
        part: content_type
        words:
          - "text/html"
Running the Scan
To run this template, we will use the -dast flag. This flag is specifically designed to enable and run fuzzing capabilities within Nuclei.
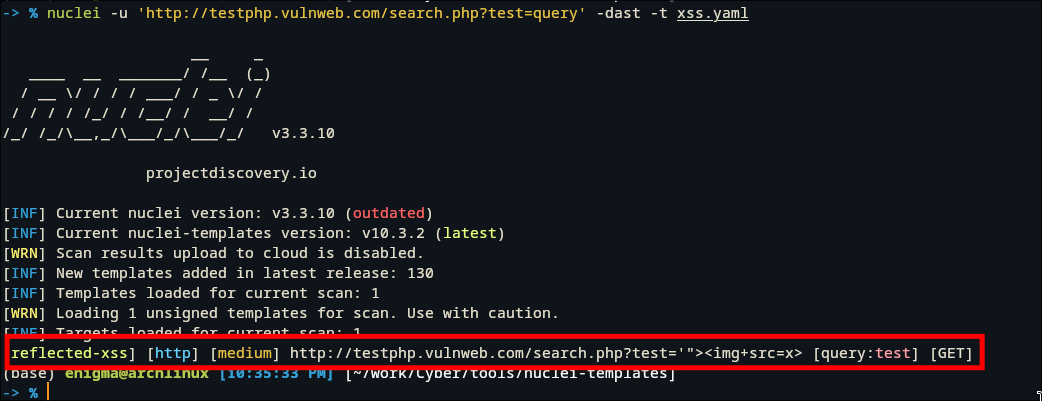
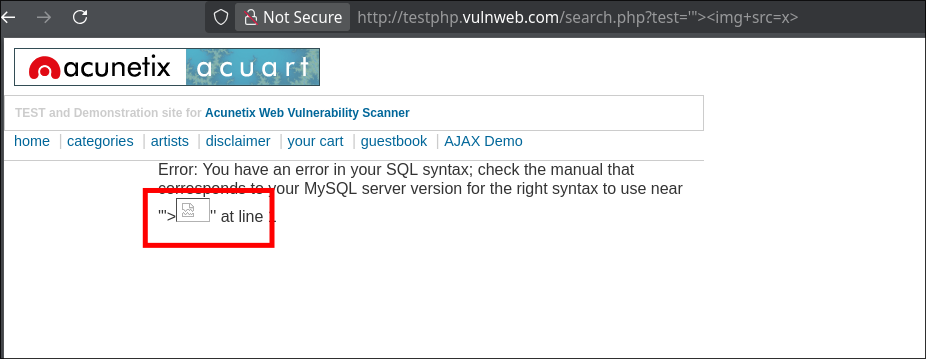
if the target is vulnerable, Nuclei will print the result in the terminal, showing exactly which payload triggered the XSS!
Integrating with Burp Suite
If you live inside Burp Suite like most pentesters, you don’t have to constantly switch to the terminal.
Here is how to set it up:
- The Prerequisite: Jython Since this extension is written in Python, Burp needs an interpreter to run it.
- Download the Jython Standalone JAR file.
- In Burp, go to Extensions > Settings > Python Environment.
- Select the JAR file you just downloaded.

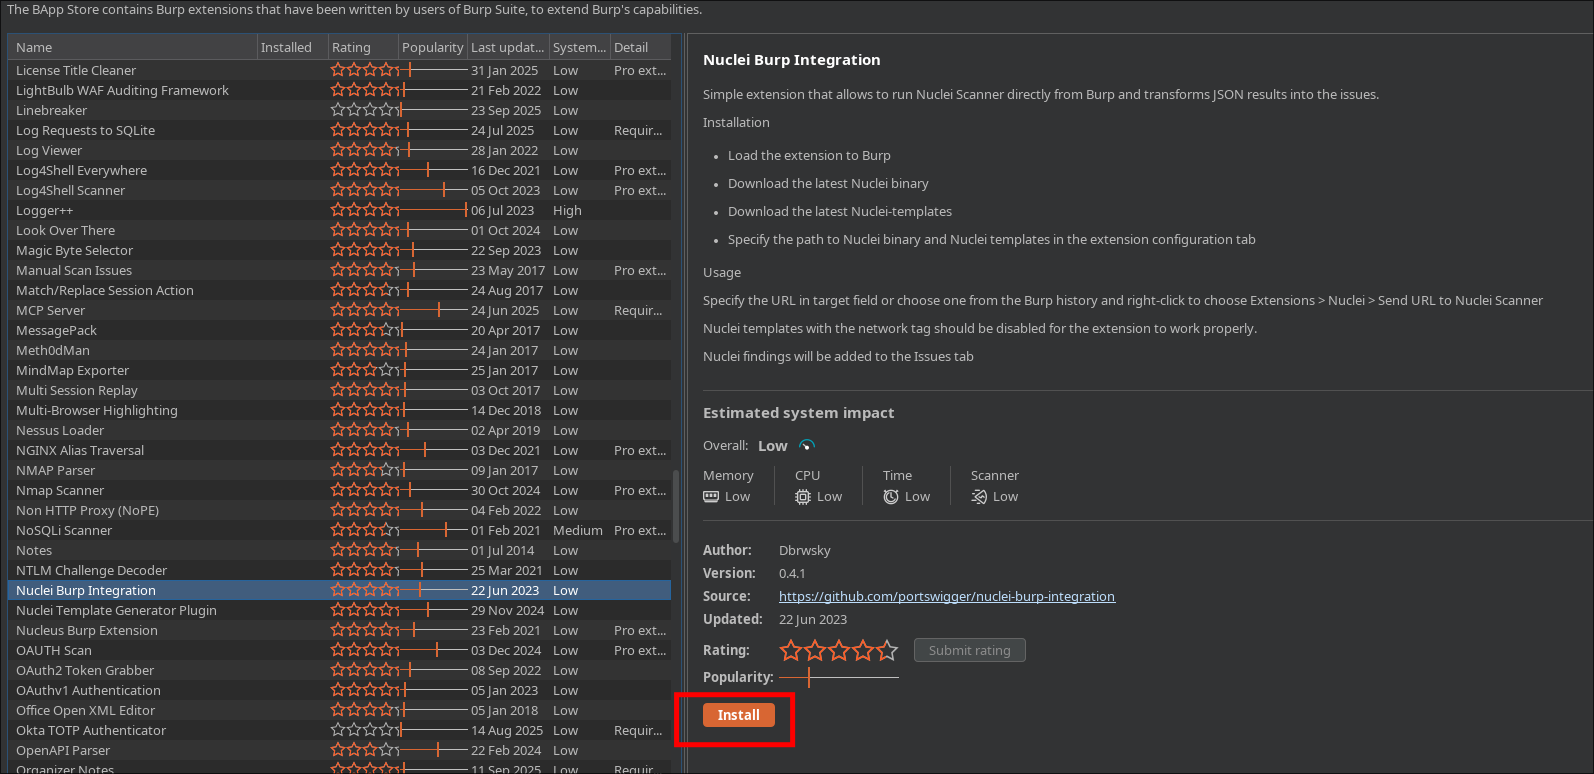
Install the Extension Head over to the Extensions tab (formerly BApp Store), search for “Nuclei Burp Integration,” and hit install.
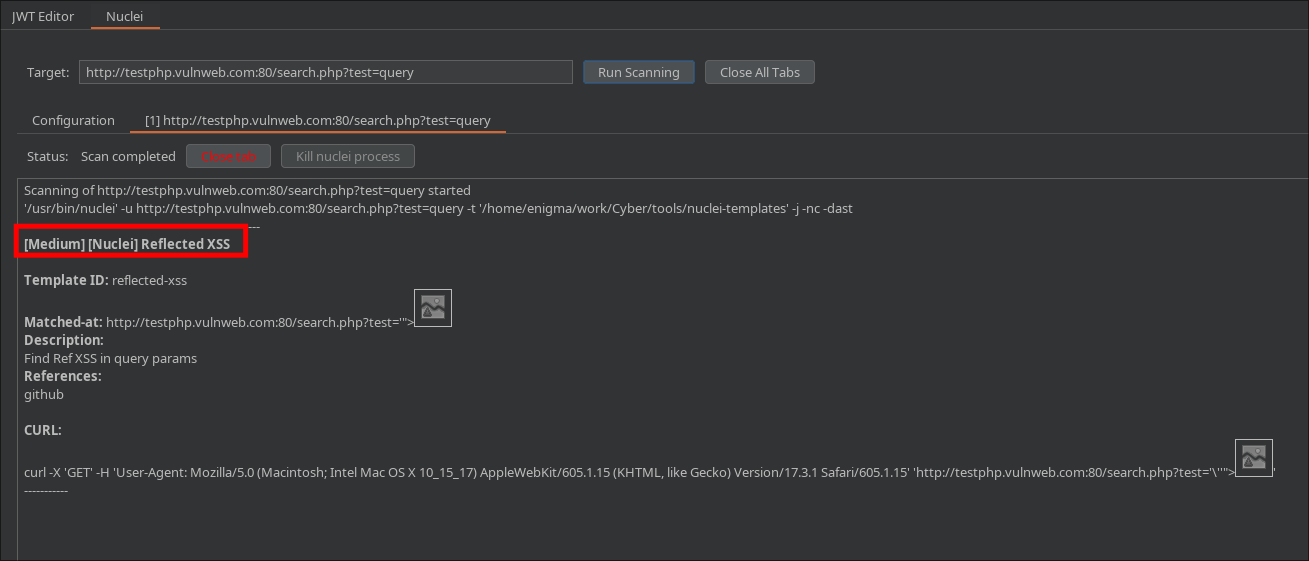
Now we can configure it to use our custom templates by setting the path of our custom templates

Then we can simply use it from repeater

Happy Hacking!